Intro
How products work in Shopify
Best Practices and Guidelines
Data Assessment & Templates
FAQs
Migrating from Vend
Simplified POS Product CSV
Best Practices and Guidelines
Here are some steps that we suggest following before importing your data into Shopify. These best practices and guidelines will ensure that your data is ready for Shopify's CSV templates, and ready to be imported into our system.
Shopify can use this field in different ways to help you manage your products, so it is important to understand how these fields work in our system. It is highly suggested to export your current product data with unique SKU codes attached to them. If you don’t have unique SKU Codes on your products in your current exported file, we would suggest adding a unique SKU to all of your products in your current system if possible, and then exporting the data again.
Having SKU Codes is highly suggested if any of the following are true:
- You need to export multiple files to get all needed product data - For example, if you need to export a file for "base" product data (name, description, price, vendor, etc.), meanwhile you need to export a separate file from product inventory counts.
- You have multiple retail or inventory locations - Importing and updating inventory counts is much easier when you have unique SKUs for each product, especially if there are multiple locations involved.
If you upload your base product info with SKU Codes included in it, Shopify will allow use the SKU Code to match up any existing product data, and you can append additional data from additional files easily. Without SKU Codes, you may find yourself needing to manually update some pieces of data because the only automated options will require the SKU Codes to be present.
As a note, if you don’t have the ability to export your products with SKU Codes from your current system, you can still import products without having them added. Just keep in mind that importing products without these codes will have some major weakness if you have multiple CSV files, or multiple inventory locations.
If you would like to use your printed barcode labels that are currently on your products with Shopify, this part of the video will be very important for you to view. Many platforms will have an encryption system that will create a discrepancy between how the Barcode data that is exported in your CSV, and what is actually printed on your labels.
Shopify requires an exact match between the data imported into Shopify and what the physical barcode label reads as. If there is any discrepancy between the two, you will not be able to use your current barcodes with Shopify.
It is important to identify any potential problems with your barcodes before importing any data, because it will be much more painful to fix this data after the import.
You can perform some spot-checking on your data by scanning a handful of your labels or tags, looking at the code it reads as, and comparing the code to the data on your CSV file:
- Download the Shopify POS app on your iPad, iPhone or Android phone. As a note, you do not need to perform this test on the device you ultimately want to sell with, you can use any device then delete the app.
- Open the app and login.
- Look at the Search Bar at the top of the app, then tap on the Barcode icon near the right side of the search bar.
- Scan a barcode of one of your products by pointing the camera at the label.
- You will see an error message. This is expected while performing this test, the barcode does not exist in your catalogue yet which is why an error will appear.
- Look at the code presented in the error, and compare it to the data on the CSV file for the same product.
- Do this for a handful of your items.
If you see a pattern of discrepancies, take the opportunity to edit these differences before moving forward. You can adjust the data on the CSV to make sure they match what is scanned. The most common occurrence is that a system will add additional characters to the beginning of a physical label when printed, meanwhile the CSV data will omit these characters. Other discrepancies that can happen are characters being added to the end of the code, or having different codes altogether.
Another important step to take related to barcodes is to make sure that your data is not appearing in Scientific Notation.
Scientific notation is used to display lengthy numbers in decimal format. Spreadsheets can have automated settings to transform your larger numbers using this format, and barcodes tend to be a common target for these settings since a spreadsheet editor will view your barcodes as large numbers. Here is an example of what it will look like:
- Full Barcode Number: 400000000123
- Scientific Notation: 4E+11
Importing your barcodes in scientific notation will prevent your barcodes from working in Shopify. To fix this issue, you must make sure to disable or change the scientific notation settings on your original file.
This is a common occurrence with the Excel program, but can happen in other editors as well. You must use the "Format Cells" option in your Spreadsheet Editor to display the full barcode before pasting the barcode data into any Shopify CSV Templates.
In Shopify, we use “Tags” as a way to identify groups of products. This can be for many uses, such as putting items in Collections or Categories together, grouping items with specific tax rules, setting channel availability, and more.
Tags appear as words, and you can add multiple tags to any product by separating them with a comma. If you have your product groups added as tags in your CSV, you can easily manage those items together in Shopify, and perform actions in bulk to them. In many cases, using Tags can help you avoid a considerable amount of manual work while sorting and organizing your catalogue after your initial data migration.
If you do not have a column for Tags on the file you have exported from your current system, you can add a new column and place any words or phrases in that cell for each for each row. If you plan on grouping any of your products in any way, you should create a Tag for the groups.
Here is an example of how it should look like:
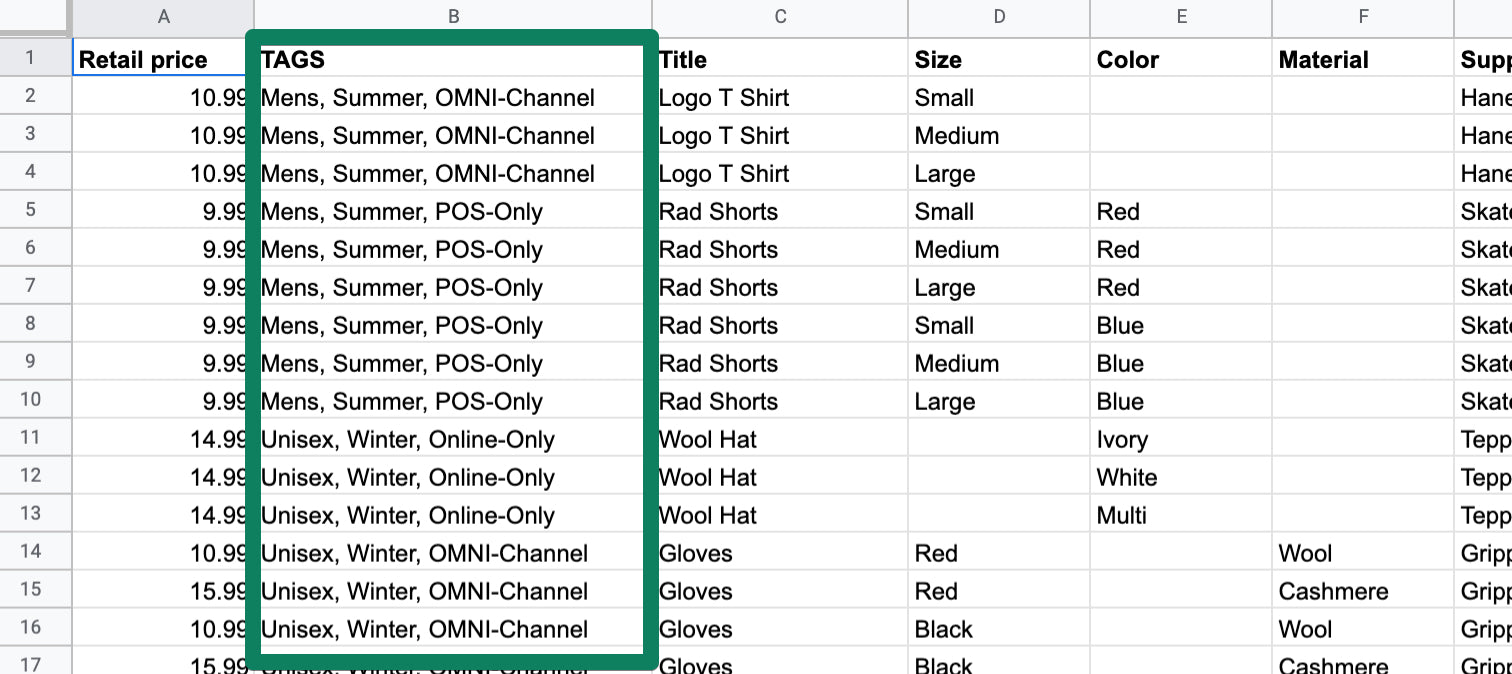
You can have whatever naming convention you would like for your tags, there is no specified format for them. These tags will stay hidden from your customers, unless you choose to display them on your online store.
For any advanced users, there is also the option of using Sheet formulas to create tags from your existing data. In the video above, the example formula is used as follows:
- Paste this on any row that you would like to combine data: =CONCATENATE(C2, ",", D2, ",", E2)
- Replace the target cells with the actual columns that hold the data (C2, D2, E2)
- You can add more columns to the formula by adding more commas and target cells.
- Once you have the formula on your first row, you can drag and drop it to do a "smart paste" of the same formula down multiple rows.
Header copied to clipboard